Merubah Photo Menjadi Lukisan

Bosen sama lukisan kamu dirumah? ayo kita bikin lukisan sendiri!

Memberi Efek Komik Pada Foto

Kamu enggak bisa masuk komik? bisa aja tuh!

Membuat Brush Wajah Sendiri

Ayo bermain-main di Photoshop dengan brush wajahmu sendiri!

Scatered Face Tutorial

Ngerasa muka kamu ancur? kamu bisa bikin lebih ancur lagi :p

Iseng-iseng Out Of Bound

Ada orang keluar dari photo? kamu juga bisa kok!

SIde

Kumpulan Informasi MayaKumpulan Informasi MayaKumpulan Informasi MayaKumpulan Informasi Maya

twitter

Ged a Widget
Showing posts with label mudah. Show all posts

15 November, 2013

Cara Mengganti Background Windows 7 Starter

Hallo guys, udah pada kenal kan sama Windows 7 starter? 
Windows 7 Starter:


Meskipun pihak Microsoft udah ngeluarin versi windows terbaru, Windows 8, tapi kebanyakan pengguna laptop ataupun personal computer (PC) masih banyak yang bertengger di Windows 7. Entah karena tidak tertarik atau memang engga sempet tuker atau bahkan komputernya sendiri ga support alias engga kuat buat jalanin Windows 8 nya. 

Meskipun Windows 7 sendiri ada beberapa jenis, tapi dipasaran masih banyak yang menggunakan Windows 7 Starter. Windows ini adalah versi pertama Windows 7 yang keluar dipasaran setelah Windows XP udah ditutup dan diganti sama Windows Vista yang (menurut kebanyakan temen gue) gagal karena banyak bug dan hal lainnya yang bikin engga nyaman users nya.

Windows 7 Starter, meskipun menang jauh dalam hal grafis dibanding sama Windows Vista, tentu, juga punya kelemahan. Gue sendiri engga terlalu tau banyak dan engga ngerasain semua kekurangannya juga, tapi yang paling berasa sih memang kenyataan kalo Windows 7 Starter tidak bisa mengganti background desktop.

Masa sih?! bener loh. Padahal kita sama-sama tau kalo background desktop itu adalah salah satu hal yang bikin user PC ataupun laptop bisa tuker-tuker untuk bikin laptop mereka jadi lebih berasa "Milik Sendiri". Sayang Windows 7 Starter engga bisa ngasih kebahagiaan itu.

tapi....

Untungnya programmer-programmer di dunia udah nolong kita buat bisa tuker background. Mau tau?

Adalah sebuah program bernama Personalization Panel 2.5. Ini sebenernya bukan bener-bener program sih, cuma tambahan panel buat Windows 7 Starter kamu guys, makanya programnya sendiri kecil, ga lebih dari 500 Kb! tapi fungsinya banyak dan "personal" banget. Pengen liat programnya kaya gimana? hayu atuh di cek.... 

engga bisa tuker background:


Kebanyakan pasti dektopnya kaya gini, cuma ada pilihan Gadget sama Screen Resolution, beda sama Windows XP yang punya properties buat nuker backgroundnya. Tapi dengan Program Personalization Panel ini, kita bisa Tukar background Windows 7 Starter kita.

Kalian tinggal download dan tukar background Windows 7 Starter disini:

Aplikasi Tukar Background Windows 7 Starter
 Password: punyaupil


Cara Download:


Inget, pas instalasi ada pilihan Regular Setup dan Lite, lebih baik pilih yang Regular Setup.

Instalasi:

Setelah selesai instalasi kalian bisa liat lagi di properties dekstop kalian (desktop klik kanan), disitu ada pilihan Personalize, nah kalian klik itu.

Pilihan Personalize:

Setelah di klik bakal ada tampilan kaya gini

Tampilan Personalization Panel:

Nah, dari sini kalian tinggal pilih tulisan Desktop Background untuk Mengganti Background Windows 7 Starter kalian. Tinggal browse foto yang mau dipake, ok, terus bisa dipilih mau full screen, mau tile, apa middle doank, itu terserah kalian, kemudian OK.

Voila!!! kalian udah bisa Mengganti Background Windows 7 Starter kalian guys!! \(^_^)/

Ini contoh SS dari gue;
Udah Ganti Background:

Ini adalah Cara Mengganti Background Windows 7 Starter buat kalian guys, mudah-mudahan bisa terbantu kaya terbantunya gue dulu pas ga tau caranya juga T___T.

Thanks for coming to my post about Cara Mengganti Background 7 Starter, keep update to my upcoming posts yah!!!

26 July, 2012

Tips Merawat Sepatu


dulu gw suka kesel banget sama yg namanya sepatu rusak. apalagi gw orangnya termasuk manusia perfeksionis, jadi kali rusak dikit ya udah g niat lagi. kebiasaan buruk? emang dan gw g suka sama itu sobs.

nah belakangan setelah menghimpun informasi dari berbagai macam jenis manusia dan temen2 gue, akhirnya dapet sedikit tips buat ngerawat sepatu, VERSI GUE! #ketawasetan

sepatu adalah bagian dari hidup kita, berikan kasih sayang. bener sobs, sepatu itu sama kaya handphone, sama kaya laptop, dan juga tivi. meskipun materialnya berbeda tetep aja kita butuh sama dia. so, pikirin tentang keselamatan doi selama pemakaian. beberapa tips adalah:

  • jangan suka nyeret kaki ke tanah. terlepas dari kebiasaan, sepatu paling sering rusaknya di sol alias bagian bawahnya gara2 diseret. nah usahain jalan tuh kaknya di angkat. lagipula kalo jalan di seret2 (maaf ni gan) orang2 kantoran banyak yg memandang rendah (pengalaman)
- penaggulangannya dengan berjalan properly, setiap jalan sepatu di angkat bukan diseret.
  • perhatikan bener-bener, udah lepas apa belom, udah pantes diganti apa masih bisa dibenerin. sepata kadang hanya butuh di lem lagi sol nya, g perlu sampai di buang. cukup beli lem kuat khusus buat sepatu atau pergi ketukang sepatu juga udah cukup.
- jangan terlalu sering menekuk sepatu. semakin sering di tekuk sol nya semakin cepet lepas, karena lem sepatu sekuat apapun tidak akan bisa bertahan kalo sering dipaksa.
  • sebisa mungkin hindari sepatu counter air alias kebasahan. sepatu kulit sekalipun punya batas ketahanan terhadap air. air bisa melunakkan benang-benang dan serat-serat dari sepatu bikin sepatu cepet lapuk dan gampang robek. 
- seandainya pun terpaksa kena airsebisa mungkin setelah di pakai langsung di jemur atau minimal diselimutin pake kain kering yg punya daya serap tinggi, tujuannya memisahkan air dari sepatu sesegera mungkin.
  • jangan dipake terlalu sering, kebiasaan mahasiswa kaya gw biasanya punya satu atau dua sepatu seumur hidup. itu hemat, tapi tidak baik untuk sepatu. semakin sering sepatu dipakai, semakin pendek umurnya. alasannya adalah karena material-materail sepatu juga dapat terkikis dan hilang tertelan waktu. ada baiknya punya tiga atau empat pasang sepatu, biar bisa ganti2 dan sepatu  cepet aus. lagipula semakin sering pake sepatu yg sama kan jadi g modis :p
- sebisa mungkin punya 2 atau 4 sepatu, yg murah g apa2 yg penting gonta ganti. biar sepatu bisa kerawat dan g cepet terkikis
  • jangan terlalu aktif menggunakan sepatu kecuali untuk sepatu yg dikhususkan untuk olahraga. keringat, sadar atau tidak, dapat merusak komponen sepatu, paling sering di bagian dalem. keringat dari kaki kita terserap di saepatu dan susah untuk kering karena kita selalu menggunakan sepatu seharian. ini bisa bikin sepatu bau, penuh bakteri dan gampang lapuk.
- usahakan jangan terlalu aktif ketika menggunakan sepatu yg bukan dikhususkan untuk olahraga. jangan terlalu sering berkeringat dan bila ada kesempatan lepaskan sepatu dari kaki anda. keringkan, angin2in, sepatu seneng digituin. sepatu juga bisa di kasih deodorant spray, tujuannya buat membunuh bakteri yg ada dalem sepatu sekaligus menghilangkan bau dalem sepatu. gw udah sering pake cara ini, dan kaki gue udah g bau lagi!! XD
  • buat sepatu pantofel, kalo gue sih biasanya suka ngasih pelembab kulit (minta aja sama temen-temen cewe bros semua, pasti ada yg sisa), tujuannya buat tetep melembabkan sepatu dan menghindari pengelupasan kulitnya karena kering.

sedikit langkah untuk merawat sepatu tanpa dicuci:

1. sediakan sepatu sepasang, spray deodorant, dan sikat sepatu

2. trus lepasin tali sepatu dari sepatunya. 

3. sika bodi sepatu dengan sikat sepatu. sampai debu-debu dan kotoran disepatu ilang. kalo sepatunya kulit pake lap basah juga bisa, pokoknya dibersihin deh! ^^

4, jangan lupa tali sepatunya juga

5. selanjutnya sepatunya di angin-anginin bentar. kalo bisa jangan langsung dibawah matahari, biar sepati engga kering dan keropos.

6. setelah itu ambil deodorant spray, trus emprotin kedalem sepatu. tujuannya buat ngebunuh bakteri sekaligus ngasih perlindungan dari keringat.

7. angin-anginin lagi sebentar, trus disimpen deh. pengalaman gw sih sepatu g bakal cepet rusak, walaupun g pernah dicuci. dan sepatu juga g cepet bau. kalo bisa langkah ini diulangin 3 minggu sekali ya. ^^

Tutorial Photoshop - Scattered Face (Wajah Berserakan)

- Please give a comment after reading, you may ask or request
- You may copy-paste the content, as long as you put a direct link to my blog
- I made the tutorials after tried it first, these are my real pictures
- Enjoy and please share it to your friends ^^

Hallo Bros and Sists!!


i've shared the trick to make Out of Bound di photoshop , this time i'd like to guide you to make "The Scattered Face". basically, this trick would make your face scattered into letters, let my picture tell you:


My Final Result

the face look like it is broken and scattered to some letters..


Click to see the steps
1. the important thing here is the font, you may DOWNLOAD HERE.
first, we gonna need "Pen Tool" (P).


2. using the "Pen Tool", you have to be able to select the face, exactly the face without letting any hair included in it.
3.after selected the whole face, you have to make the selection as smooth as possible, yo don't want people think you are a novice in photoshop. use "Convert Point Tool".


 4. with the convert tool, you could fix the rough line you created using pen tools before.


5. well...at least it'll look better...


6. once you finished, open "Path" window, if you can't find it, look at the picture. once you find it give a right-click on the layer and choose "Make Selection"


7. the object would be surrounded by dashed line. next, create a new copied layer. look at the top options bar, choose Layer- New - Layer Via Copy (CTRL+J)


8. you'll have a new layer with your face only in it. from now on, you are working in this layer. to make te work easier, just hide the original picture, click "eye" icon beside the layer.


9. click "Image - Adjustment - Black and White"


10. Make a new Layer "Layer - New - Layer"


11. a new empty layer would appear on the top list of layers. move it below the face layer, click and drag down until the position of the empty layer is now below the face layer. hit "D" to make the basic color back to black and white. take "Paint" tool (G).


12. choose the empty layer, then click the workboard so then the whole board is black.

13. make a new layer, the use "Brush Tool" (B). make sure you are working on the last empty layer.


14. load the brush you've downloaded. look at he brush window, find a small arrow and click, an option window should appear, click Load Brush. (look at the picture)


15. in the same Brush Window, you'll see the brush you've loaded. there will be new brushes in it, look like small dots. we will use this to build your face, make sure the foreground is 'White' and you are working on the empty layer.


16. you have to use the brush on the object (face). the more you put the brush on it, the more solid the face would be. contrarily, the less you put the brush on it, the less solid the face would be and form a scattered effect. Look at the picture for illustration.


17. make sure that you are working on the empty layer and the oppacity is in 100%.


18. click and hold together (CTRL+ALT+layer with the brush inside). you'll see so many dashed lines. choose the layer with the face inside, copy paste (CTRL+C -- CTRL+V)


19. there will be a new layer with the face that already formed by some letters. hide all layers except the new one, choose "Burn Tool". try to smooth the margin of the solid face.


20. make a new window, choose File - New. follow the instruction in the picture.

gambarnya salah, harusnya panahnya mengarah ke file
bukan ke edit
21. there will be 2 windows, the one with our edited picture, the other one is an empty window. you have to move the edited layer to the new window. click the layer, and drag it to the new window.

22. if the picture is too large for the board, zoom out the board (CTRL + -). click the face and hit (CTRL+T). now you can minify the face, dont forget to hold "Shift" key to make sure the picture size would be like the original, once you done hit (CTRL+enter).


23. take White Color as the foreground color, take the brush one more time (B). click "Brush Tip Shape (see picture).


24. put the brush on_or_around the face. the trick is, you have to make it seems logical, i put the brush out of the face to make people think tat the face is being blown by the wind.


you could make some unique pictures through many tricks, some of them are even easy to do, just like this one. good luck on your trial, and wait for my next tutorials!! ^^


-Luthfi-

Gampang Memulai Menggunakan Photoshop

hallo bros and sists! ^^

sedikit motivasi dan share pengalaman gw ke sobat-sobat semua, mudah-mudahan bisa ngebantu dan menambah minat sobat semua dalam dunia photosop.

abis baca jangan lupa komeng ya!! ^^
...............................................................................................................................................................

banyak orang yg bilang maenin photoshop ato yang biasa dibilang sotosop di KasKus itu susah, ribet, bikin bingung, DLL, DSB, DST. padahal kalo sobat tau gimana nikmat dan asiknya main2 photoshop, wah pasti ketagihan deh!!

dalam dunia pergambaran, photoshop sangat berguna. beberapa motivasi yg sering dipakai dari photoshop antara lain:

  • photo fixing atau perbaikan photo digital. biasanya yg sering make ginian nih tukang foto studio, foto wedding, dan foto keluarga. tujuannya apa? ya itu buat benerin muka yang jerawatan, memperganteng yg jelek, memutihkan yg item, dan lain-lain dengan tujuan mulia. photo fixing banyak sekali digunakan dalam kehidupan kita sehari-hari. biasanya nih, tukang foto KTP itu benerin muka kita dulu, ya...minimal ilangin jerawat kita dulu lah. abis itu baru di print. ibaratnya kaya photoshop itu make up kedua kita, tuh ada yg jual botolnya! hehehe...

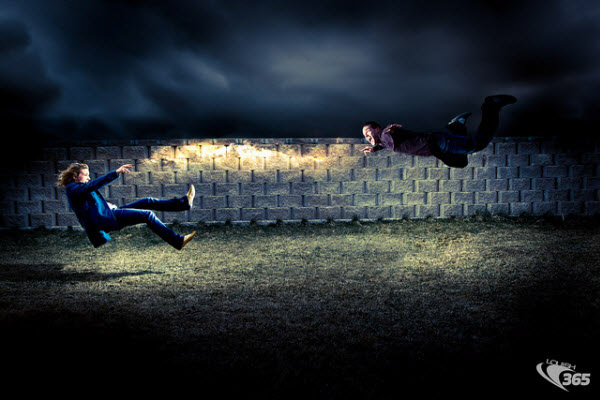
  • creativity picture. photoshop punya sekian banyak potensi buat bikin sebuah foto jadi menakjubkan. beberapa orang make photoshop buat bkin berbagai macem teknik seperti membuat badannya keliatan melayang (levitation), bikin badannya keluar dari foto (outofbound), ada lagi bikin mukanya berantakan (scattered face) dan macem-macem lagi. walaupun tujuannya iseng-iseng, tapi hasilnya bener-bener bagus banget dan bikin orang suka berdecak kagum, termasuk gw! ada banyak hasil-hasil photoshop yang keren seliweran di internet dan juga tutorialnya, gw juga nyediain beberapa tutorial dan bakal teru di update kok ^^
tuh, seru g tuh gambarnya? kita juga bisa bikin kok, yah mungkin g seheboh itu
nanti gw bakal update tutorial buat bikin foto sobat jadi melayang gitu ^^

  • ada fungsi khusus di photoshop, ya itu buat bikin gambar GIF (graphic interchange format), yaitu gambar yg sering kita liat di forum-forum yg gambarnya bisa bergerak-gerak. lucu kan? :)
yah, gambarnya jadi rusak pas di upload, mungkin bro dan sist
bisa cari di internet aja deh kalo gitu :)

menurut gw sih tiga point diatas itu sih yg paling sering jadi motivasi orang buat make photoshop. nah, trus gimana dengan niat untuk mulai belajar? gampang....

info ini sih g baru, bros and sists pasti banyak nemuin di blog-blog laennya, tapi g apa-apa, biar blog gw lebih ada isinya sedikit :D

  • yang pasti kalo pengen mulai sesuatu harus punya niat. emank biasanya semua berawal dari coba-coba, tapi coba2 doank tuh g bakal bisa terus. nah kalian mesti niat buat bener-bener belajar, minimal niat buat sekedar tau, yg penting niat. pasti suatu saat kalian jadi coba-coba, kaya gw. tapi sekali laig, coba-coba itu g bakal lama, kalian harus juga punya aksi.
  • kalian bisa coba2 dulu smua tools yg ada di photoshop. ada beberapa blog yg ngasih tau fungsi2 tools dalam photoshop, seperti contohnya disini. sedikit2 belajar lah...kenal dulu ini apa dan buat apa.
  • trus mulai deh iseng2. kaian bisa masukin foto apa aja dan diapain aja. yg penting kalian tau kalo tools ini dipake jadinya gimana. ini bisa buat stimulasi biar besok-besok g bingung lagi...
  • ikutin tutorial2 yg ada banyak di internet. jangan langsung yg susah2! yg gampang aja dulu...
  • rajin, luangkan waktu, 10-20 menit cukup lah buat ngulang2 ato nyoba2 hal baru di photoshop. yg pnting inget dan yg udah dipelajarin g lupa.
  • jngan lupa buat share hasil kalian, dan juga share pengalaman sama yg udah suhu. pengetahuan kalian bertambah, dan hasil kalian bisa di nilai dan dikasih saran agar bisa jadi lebih baek! 
segitu dulu dari gw, itu semua di atas asli dari pengalaman gw sendiri. jadi jangan takut sob, gw aja yg dulu g bisa sekarang udh mulai gampang makenya, apa lagi kalian yg semangat?!

good luck ya bros and sists, terus berjuang dan belajar.

25 July, 2012

Tutorial Photoshop - Out of Bound

- Please give a comment after reading, you may ask or request
- You may copy-paste the content, as long as you put a direct link to my blog
- I made the tutorials after tried it first, these are my real pictures
- Enjoy and please share it to your friends ^^


Hallo bro dan sist, :D

this would be my first tutorial about picture editing using photoshop ^^.

this time i'd like to guide you guys about how to make "Out of Bound" pictures. i've tested the tutorial first before write it down, so this tutorial is based on my trial. So do exactly the same as what you read (you may make some trial though :)_ and sorry for my ugly face (#pffttt)


the result, more or less, should be like this---


My Final Result


Out Of Bound, where the object looks
like going out of the frame


Klick show to see the steps


1. ok, first you have to use a picture, open it in photoshop


2. next, you have to make a new empty layer, it would be the background of the picture. 


3. you may choose your favorite colors, in this trial i used green (look at the result). 


4. to make it easier in work, you may unclick the "eye" icon, it would make the content of the basic layer dissapear


5. i used the gradient color as the background, you may make it as you like. you could hit "G" to open the gradient window


.


6. choose as showed in the last picture, than click on the empty screen and drag it from corner to corner, just like the picture shows


7. this is my result using gradient, u may choose another color


8. reappear the basic layer, click the eye icon you hit before.


9. this is the editing process. choose "marquee" tool (M). then make a square on the half of the picture (look at the picture). if you selected the wrong place, you may delete it using (CTRL+D).


10. once you made the square, look at the top options bar, choose (EDIT - TRANSFORM - PERSPECTIVE).


11. the square you made before should look different. click the top corner (whichever) and drag it to the middle of the picture. the top side of the square would be smaller than the bottom side.


12. next, finish it by hitting the (CTRL+Enter), don't click any tools (it may erase the square). choose (add layer mask). if you don't know where it is, the pictures shows you.


13. the picture would be cut according to the square we made before. next you make a new layer from the edited layer, select the layer then hit (CTRL+J).


14.select the new layer, then select the mask (the one which is consist of black and white), right click and choose delete option.


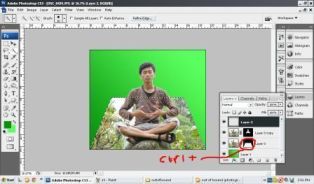
15. the mask should be gone now. the next part would be tricky, you have to separate the object (in this picture the object is my self) that you wanted to make it look like out of the picture. choose Quick Selection Tool (W) and try to take just the object, no background picture allowed to be selected. in this picture, the trees and the sky should not be selected, just select the whole body .


16. the result would be, my body covered by dashed line, which is mean ready to edit. choose add vector mask (if you do not know where it is, the next picture will show you).


17. voila! the picture should be look like my picture.


18. next, make a new layer, choose Layer -  New - Layer.


19. keep on the new layer, click (CTRL+click mask in the first masked layer).


20. look at the top options bar, click Edit - Stroke. make the px "40" and the color should be "White", this color would be the frame of the final picture (look at the frame in the result picture)


21. if you doing it right, your picture should have a white line on it. you just have to arrange the layer in the right order. you have to rearrange the layers until the white line placed behind the object (see the picture)


22. everything has set up. click (SHIFT+all layers except the background layer_the one white the green color). remember, EXCEPT the Background layer. then you do right-click, choose "Merge Layers" (CTRL+E). 


23. the whole selected layers would fused. you may stop right here, the tricks is done. but if you want to make the the frame curved and look just like a real photograph, select he layer, choose Edit - Transform - Warp. there would be 9 squares on your picture.


24. click and hold the bottom-corner point, drag it up a little bit. it would make the picture curved. you may make it based on your desire, as long as the object (the body) not curved.


25. to make it look like real, make the shadow below the picture. make a new layer.


26. select he empty layer, click "Brush" (B). choose the black color ( how to set it, look at the picture), then brush the area below the picture. in this step, you have to be able to make the right amount of black brush, to make the brush look like a real shadow of the picture. if it is too thick, you may reduce the opacity to "50". 


next step would be SHOW IT UP TO YOUR FRIENDS!!


you may create other pictures using this trick, as long as you know what you are doing and don't mess up too much.

have a good editing-day my fellow friends, wait for my next tutorials!!!


reference
http://www.youtube.com/watch?v=LbUgltl9DgM