Merubah Photo Menjadi Lukisan

Bosen sama lukisan kamu dirumah? ayo kita bikin lukisan sendiri!

Memberi Efek Komik Pada Foto

Kamu enggak bisa masuk komik? bisa aja tuh!

Membuat Brush Wajah Sendiri

Ayo bermain-main di Photoshop dengan brush wajahmu sendiri!

Scatered Face Tutorial

Ngerasa muka kamu ancur? kamu bisa bikin lebih ancur lagi :p

Iseng-iseng Out Of Bound

Ada orang keluar dari photo? kamu juga bisa kok!

SIde

Kumpulan Informasi MayaKumpulan Informasi MayaKumpulan Informasi MayaKumpulan Informasi Maya

twitter

Ged a Widget
Showing posts with label easy. Show all posts

26 July, 2012

Gampang Memulai Menggunakan Photoshop

hallo bros and sists! ^^

sedikit motivasi dan share pengalaman gw ke sobat-sobat semua, mudah-mudahan bisa ngebantu dan menambah minat sobat semua dalam dunia photosop.

abis baca jangan lupa komeng ya!! ^^
...............................................................................................................................................................

banyak orang yg bilang maenin photoshop ato yang biasa dibilang sotosop di KasKus itu susah, ribet, bikin bingung, DLL, DSB, DST. padahal kalo sobat tau gimana nikmat dan asiknya main2 photoshop, wah pasti ketagihan deh!!

dalam dunia pergambaran, photoshop sangat berguna. beberapa motivasi yg sering dipakai dari photoshop antara lain:

  • photo fixing atau perbaikan photo digital. biasanya yg sering make ginian nih tukang foto studio, foto wedding, dan foto keluarga. tujuannya apa? ya itu buat benerin muka yang jerawatan, memperganteng yg jelek, memutihkan yg item, dan lain-lain dengan tujuan mulia. photo fixing banyak sekali digunakan dalam kehidupan kita sehari-hari. biasanya nih, tukang foto KTP itu benerin muka kita dulu, ya...minimal ilangin jerawat kita dulu lah. abis itu baru di print. ibaratnya kaya photoshop itu make up kedua kita, tuh ada yg jual botolnya! hehehe...

  • creativity picture. photoshop punya sekian banyak potensi buat bikin sebuah foto jadi menakjubkan. beberapa orang make photoshop buat bkin berbagai macem teknik seperti membuat badannya keliatan melayang (levitation), bikin badannya keluar dari foto (outofbound), ada lagi bikin mukanya berantakan (scattered face) dan macem-macem lagi. walaupun tujuannya iseng-iseng, tapi hasilnya bener-bener bagus banget dan bikin orang suka berdecak kagum, termasuk gw! ada banyak hasil-hasil photoshop yang keren seliweran di internet dan juga tutorialnya, gw juga nyediain beberapa tutorial dan bakal teru di update kok ^^
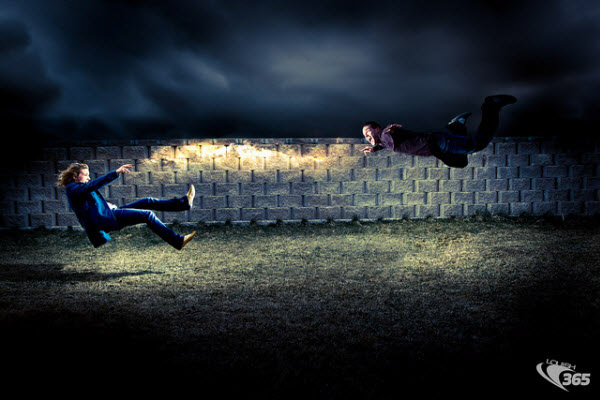
tuh, seru g tuh gambarnya? kita juga bisa bikin kok, yah mungkin g seheboh itu
nanti gw bakal update tutorial buat bikin foto sobat jadi melayang gitu ^^

  • ada fungsi khusus di photoshop, ya itu buat bikin gambar GIF (graphic interchange format), yaitu gambar yg sering kita liat di forum-forum yg gambarnya bisa bergerak-gerak. lucu kan? :)
yah, gambarnya jadi rusak pas di upload, mungkin bro dan sist
bisa cari di internet aja deh kalo gitu :)

menurut gw sih tiga point diatas itu sih yg paling sering jadi motivasi orang buat make photoshop. nah, trus gimana dengan niat untuk mulai belajar? gampang....

info ini sih g baru, bros and sists pasti banyak nemuin di blog-blog laennya, tapi g apa-apa, biar blog gw lebih ada isinya sedikit :D

  • yang pasti kalo pengen mulai sesuatu harus punya niat. emank biasanya semua berawal dari coba-coba, tapi coba2 doank tuh g bakal bisa terus. nah kalian mesti niat buat bener-bener belajar, minimal niat buat sekedar tau, yg penting niat. pasti suatu saat kalian jadi coba-coba, kaya gw. tapi sekali laig, coba-coba itu g bakal lama, kalian harus juga punya aksi.
  • kalian bisa coba2 dulu smua tools yg ada di photoshop. ada beberapa blog yg ngasih tau fungsi2 tools dalam photoshop, seperti contohnya disini. sedikit2 belajar lah...kenal dulu ini apa dan buat apa.
  • trus mulai deh iseng2. kaian bisa masukin foto apa aja dan diapain aja. yg penting kalian tau kalo tools ini dipake jadinya gimana. ini bisa buat stimulasi biar besok-besok g bingung lagi...
  • ikutin tutorial2 yg ada banyak di internet. jangan langsung yg susah2! yg gampang aja dulu...
  • rajin, luangkan waktu, 10-20 menit cukup lah buat ngulang2 ato nyoba2 hal baru di photoshop. yg pnting inget dan yg udah dipelajarin g lupa.
  • jngan lupa buat share hasil kalian, dan juga share pengalaman sama yg udah suhu. pengetahuan kalian bertambah, dan hasil kalian bisa di nilai dan dikasih saran agar bisa jadi lebih baek! 
segitu dulu dari gw, itu semua di atas asli dari pengalaman gw sendiri. jadi jangan takut sob, gw aja yg dulu g bisa sekarang udh mulai gampang makenya, apa lagi kalian yg semangat?!

good luck ya bros and sists, terus berjuang dan belajar.

25 July, 2012

Tutorial Photoshop - Out of Bound

- Please give a comment after reading, you may ask or request
- You may copy-paste the content, as long as you put a direct link to my blog
- I made the tutorials after tried it first, these are my real pictures
- Enjoy and please share it to your friends ^^


Hallo bro dan sist, :D

this would be my first tutorial about picture editing using photoshop ^^.

this time i'd like to guide you guys about how to make "Out of Bound" pictures. i've tested the tutorial first before write it down, so this tutorial is based on my trial. So do exactly the same as what you read (you may make some trial though :)_ and sorry for my ugly face (#pffttt)


the result, more or less, should be like this---


My Final Result


Out Of Bound, where the object looks
like going out of the frame


Klick show to see the steps


1. ok, first you have to use a picture, open it in photoshop


2. next, you have to make a new empty layer, it would be the background of the picture. 


3. you may choose your favorite colors, in this trial i used green (look at the result). 


4. to make it easier in work, you may unclick the "eye" icon, it would make the content of the basic layer dissapear


5. i used the gradient color as the background, you may make it as you like. you could hit "G" to open the gradient window


.


6. choose as showed in the last picture, than click on the empty screen and drag it from corner to corner, just like the picture shows


7. this is my result using gradient, u may choose another color


8. reappear the basic layer, click the eye icon you hit before.


9. this is the editing process. choose "marquee" tool (M). then make a square on the half of the picture (look at the picture). if you selected the wrong place, you may delete it using (CTRL+D).


10. once you made the square, look at the top options bar, choose (EDIT - TRANSFORM - PERSPECTIVE).


11. the square you made before should look different. click the top corner (whichever) and drag it to the middle of the picture. the top side of the square would be smaller than the bottom side.


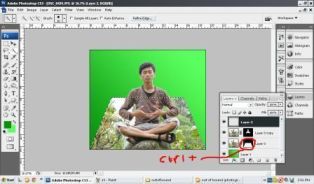
12. next, finish it by hitting the (CTRL+Enter), don't click any tools (it may erase the square). choose (add layer mask). if you don't know where it is, the pictures shows you.


13. the picture would be cut according to the square we made before. next you make a new layer from the edited layer, select the layer then hit (CTRL+J).


14.select the new layer, then select the mask (the one which is consist of black and white), right click and choose delete option.


15. the mask should be gone now. the next part would be tricky, you have to separate the object (in this picture the object is my self) that you wanted to make it look like out of the picture. choose Quick Selection Tool (W) and try to take just the object, no background picture allowed to be selected. in this picture, the trees and the sky should not be selected, just select the whole body .


16. the result would be, my body covered by dashed line, which is mean ready to edit. choose add vector mask (if you do not know where it is, the next picture will show you).


17. voila! the picture should be look like my picture.


18. next, make a new layer, choose Layer -  New - Layer.


19. keep on the new layer, click (CTRL+click mask in the first masked layer).


20. look at the top options bar, click Edit - Stroke. make the px "40" and the color should be "White", this color would be the frame of the final picture (look at the frame in the result picture)


21. if you doing it right, your picture should have a white line on it. you just have to arrange the layer in the right order. you have to rearrange the layers until the white line placed behind the object (see the picture)


22. everything has set up. click (SHIFT+all layers except the background layer_the one white the green color). remember, EXCEPT the Background layer. then you do right-click, choose "Merge Layers" (CTRL+E). 


23. the whole selected layers would fused. you may stop right here, the tricks is done. but if you want to make the the frame curved and look just like a real photograph, select he layer, choose Edit - Transform - Warp. there would be 9 squares on your picture.


24. click and hold the bottom-corner point, drag it up a little bit. it would make the picture curved. you may make it based on your desire, as long as the object (the body) not curved.


25. to make it look like real, make the shadow below the picture. make a new layer.


26. select he empty layer, click "Brush" (B). choose the black color ( how to set it, look at the picture), then brush the area below the picture. in this step, you have to be able to make the right amount of black brush, to make the brush look like a real shadow of the picture. if it is too thick, you may reduce the opacity to "50". 


next step would be SHOW IT UP TO YOUR FRIENDS!!


you may create other pictures using this trick, as long as you know what you are doing and don't mess up too much.

have a good editing-day my fellow friends, wait for my next tutorials!!!


reference
http://www.youtube.com/watch?v=LbUgltl9DgM